IPv6 Routing can be handled with OSPF – but it uses OSPFv3 isntead of OSPFv2. Implementation will be demonstrated through a lab.
Setting up the initial IPv6 Network
Because I am much less familiar with IPv6 networks than I am with IPv4 networks I’m going to include the setup for this simple IPv6 network and its basic functionality.
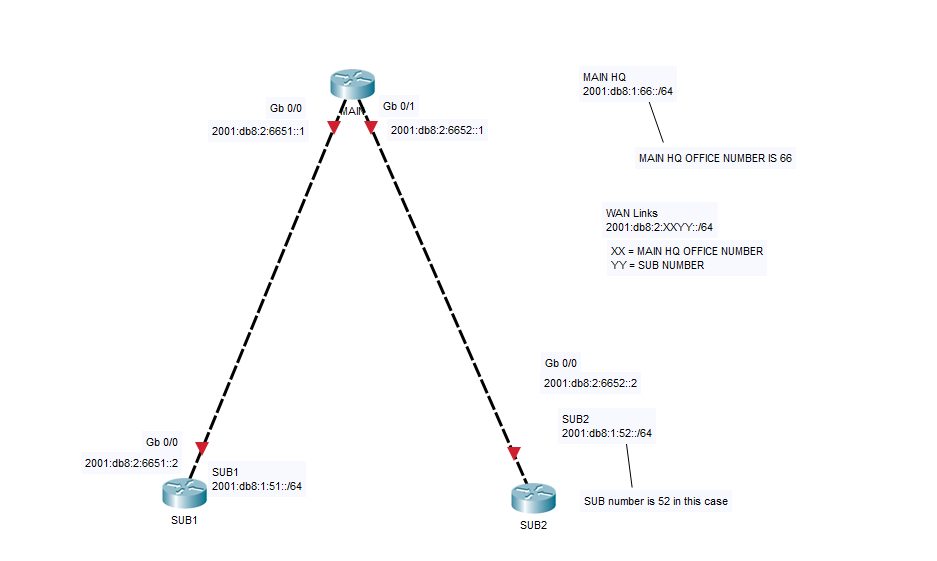
So far the interfaces have been labelled with their IPv6 addresses, the subnets assigned to each of the SUB devices has been shown, but no config at all has happened on the Router other than giving them all hostnames.
The first thing that needs to be done when doing anything with IPv6 is the command ipv6 unicast-routing needs to be run. If this isn’t run then no IPv6 routing take place at all, and most routers do not have this on my default. So run this on all routers you want to involve.

Next step is to add the IPv6 address so it matches what is in the diagram. I’m also going to add a loopback address of 2001:db8:1:66::1/64 to the MAIN router and run the show ipv6 interface brief command to confirm it has the IPv6 address assigned.
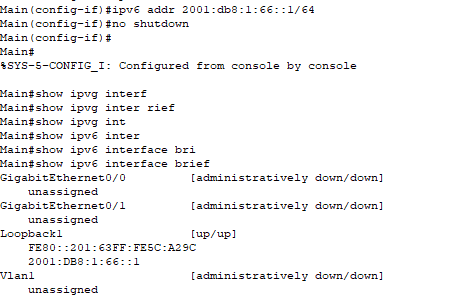
As we can see from the output the Loopback1 interface has been given the IPv6 address we assigned to it. The IPv6 Link local address has also been automatically generated. I’ll now repeat this for each of the interfaces we’re configuring IPv6 on.
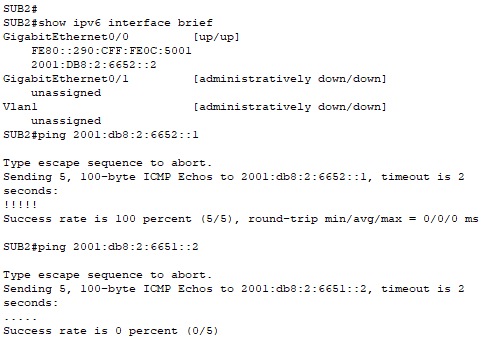
Once that has been applied we can confirm connectivity by sending a ping from one of the SUB devices to the MAIN device interface. As there are not yet any routing protocols enabled you will not be able to ping the connected interface of the other SUB router.
The OSPFv3 bit
The setup of OSPFv3 is similar to how it is in OSPFv2, but the Network command is not in this version.
To enforce best practice networks are advertised on an Interface basis. So same concept just different implementation.
To get into the OSPFv3 process you run the command ipv6 router ospf [PROCESS ID] . Following that you might get a message telling you a router-id couldn’t be picked and to assign one manually. router-id [X.X.X.X] with the X’s being a number between 0 and 255. (The highest number will be the Router-ID) – to be done on all Routers that you’ll be using EIGRP on.

Then enter the interface you’re configuring again and run the command interface [Your interface] And then the command: ospf [PROCESS ID] area [AREA ID].

This tells OSPF to activate on that interface and advertise out whatever network it finds on there. (and then this step repeated across all the interfaces in the network).
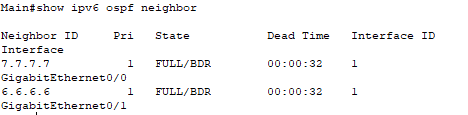
Now the settings have been applied to all three routers and their connected interfaces we can use the show ipv6 ospf neighbor command to confirm that neighbour relationships are forming as expected.
The debugging commands are the same in OSPFv3 as they are in OSPFv2, but when running them you’ll have to put ipv6 instead of ip.